Metal Abrasives, Thrown By The Rapidly Rotating Blast Wheel, Are Accelerated Toward The Surface Being Prepared. The Media Strikes The Surface And Rebounds, Along With The Removed Contaminants, Into A Recovery Chamber Or Separator. The Dust Collector Removes Pulverized Abrasives, Dust, And Contaminants. Very Little Abrasive Is Lost And The Usable Media Is Returned To The Storage Hopper For Re-circulation By The Blast Wheel.
Different Surface Profiles Can Be Achieved By Varying The Shot Size, Shot Flow Rate, And Machine Travel Speed. Shot Blasting Produces The Most Course Profile While Removing Any Deteriorated Or Weak Concrete, Leaving The Surface Immediately Ready For Coating. This Is The Number One Form Of Preparation Used In The Coatings Industry Today.
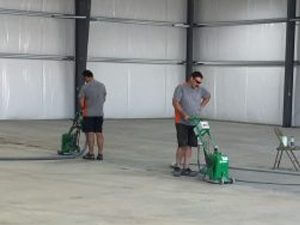
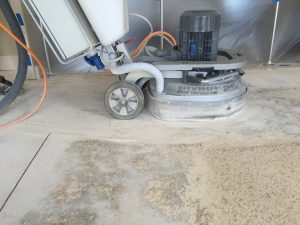
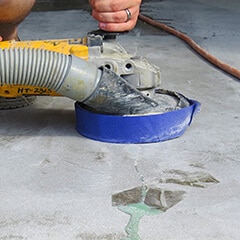
In Applications Where A Shot Blaster Is Not Preferred We Use A Diamond Grinding Process. Typically This Process Is Used When You Have Soft Deteriorated Concrete Or A Thick Preexisting Coating. The Use Of Course Grit Diamonds Or Polycrystalin Diamonds Help Us Achieve The Required Profile. Our Diamond Grinders Consist Of Eight Rotating Heads. By Varying The Grits And Bonds Used, Diamond Grinders Can Be Affective On Differing Concrete Types. Diamond Grinders Are Especially Helpful When Cracks Or Joints Are At Different Profiles And Need To Be Leveled.
CONCRETE RESTORATION
For All Of Our Applications (Residential, Commercial, Outdoor) The Installation Process Always Starts With A Full Evaluation Of Your Existing Concrete Surface. We Investigate Structural Condition, Harness And Moisture Content.
We Then Use This Analysis To Determine How We Approach The Most Important Step — Concrete Preparation.
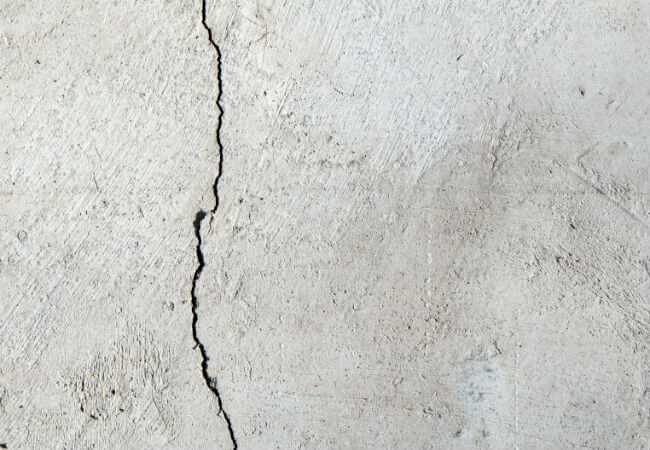
CRACKS
First, We Use A Diamond Grinder With A V-Blade To Open Up And Abrade Both Sides Of The Crack. By Doing This, We Gain Additional Surface Area For Better Product Adhesion.
Next, We Mix Our Polyurea Concrete Mix Material And Overfill The Crack.
When The Material Is Fully Cured (Typically Only Seven To Ten Minutes!) We Grind The Overfilled Material Flush With The Concrete Surface. This Leaves The Floor Smooth And Level.
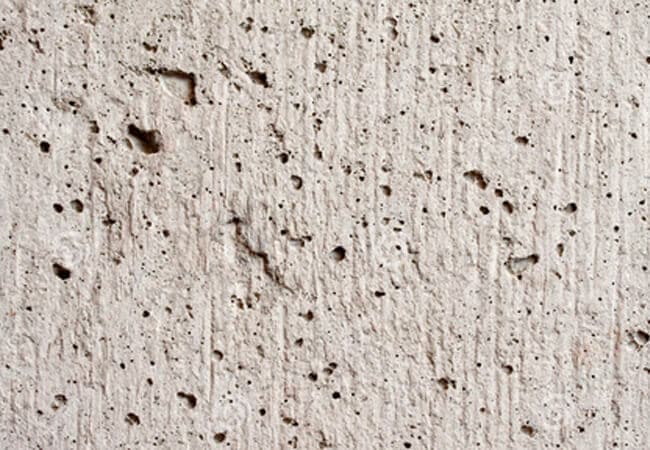
PITS
All Floor Pits Are Then Prepped Using The Shot Blaster To Clean And Remove Weak Concrete. This Gives The Damaged Area A Course Profile For Our Repair Material To Bond To. Next, Just Like Repairing A Crack, We Mix Our Mender Material And Overfill The Pit.
When The Material Is Fully Cured (Typically Seven To Ten Minutes!) We Grind The Overfilled Material Flush With The Concrete Surface. This Leaves The Floor Smooth, Level And Ready For Coating.
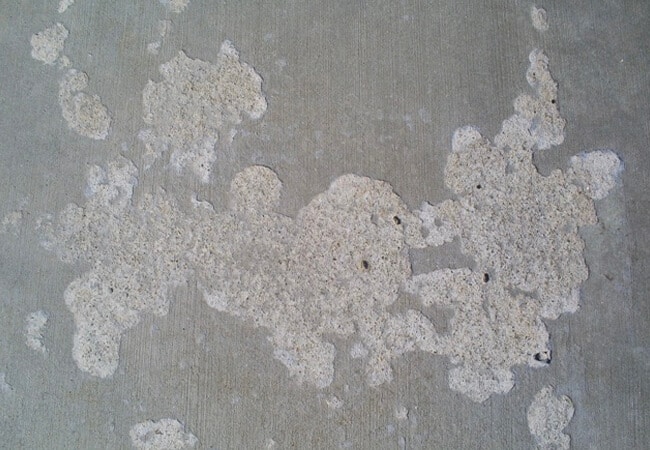
SPALLING
We Prepare All Spalled Areas Just Like We Repair Pits. We Use The Shot Blaster To Remove All The Deteriorated Concrete. The Remaining Concrete Is Strong And Ready For Our Repair Material To Bond To It.
Next, Depending On The Severity Of The Spalling, We Mix Up A Small To Large Batch Of Mender Material And Use A Trowel/Squeegee To Pull The Material Into The Spalled Areas. Again, We Over Fill These Areas To Be Able To Grind Them Back Down. This Step May Be Repeated On Floors With Severe Spalling.
When Our Material Is Fully Cured (Typically Seven To Ten Minutes) We Grind The Overfilled Material Flush With The Concrete Surface.
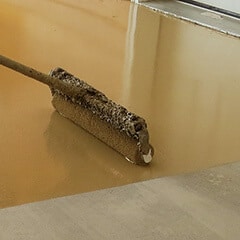
1 – COATING THE FLOOR – BASE COAT
We Start By Mixing A Small Amount Of Our Base Coat, A 100% Solids Self-Priming Pure Polyurea, Which Is Used To Cut In All The Edges Around The Floor. When The Floor Edges Are Cut In, We Mix Small Batches Of Base Coat At A Time And Spread It Out At A Rate Of Approximately 250 Sq. Ft. Per Gallon. This Is Achieved By Pouring The Mixed Coating Onto The Floor In A Line And Using A Roller/Squeegee To Spread The Material Evenly To The Desired Thickness. We Repeat The Mixing And Rolling Process Until The Whole Surface Is Covered Completely.
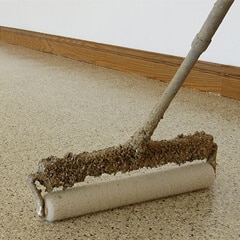
2 – BROADCASTING THE COLOR FLAKES
When The Floor Is Coated Completely, We Mix Our Flakes (Sometimes Called Chips) In A Large Container To Ensure An Even Blend Of Colors. We Then Broadcast The Flakes Into The Wet Coating By Hand, Covering The Whole Floor With The Flakes. By Using Large Quantities Of Flakes, We Ensure That The Floor Is Completely Covered, Leaving It Uniform In Color And Texture. The Cure Time Of Our Base Coat Is Typically 30-60 Minutes, Depending On Outside Temperatures.
3 – SCRAPING OF THE FLAKE
Once Our Base Coat Is Fully Cured We “Scrape” Down The Flake With Metal Blade Scrapers, We Walk Along The Floor Putting Pressure On The Blade To Cut And Scrape Any Loose Or Vertically Standing Flakes. In Most Applications, We Scrape The Floor From Front To Back And Also Side-To-Side To Ensure We Have Hit All Angles Of The Flake. This Results In The Floor Having A Nice Even Texture. At This Time, We Also Scrape Vertical Surfaces (Such As Walls And Steps) By Hand To Knock Down Any Loose Flake. We Then Vacuum To Recover Any Loose Flake Left Behind On The Floor.
4 – CLEAR COAT APPLICATION
After Our Floor Is Prepped, Coated, Flaked, Scraped, And Vacuumed, We Can Start Our Final Step — The Application Of The Clear Coat. Typically, We Use Polyaspartic Polyurea UV Stable Clear Coat That Is Applied At A Rate Of 100-120 Sq. Ft. Per Gallon. We Start By Clear Coating All Of The Vertical Surfaces And Brushing The Perimeter Of The Floor Itself. We Pour The Mixed Product Directly On To The Floor And Use A Roller/Squeegee To Spread The Coating To The Desired Thickness. Then We Use An 18-Inch Roller To Back-Roll And Cross-Roll The Entire Surface. This Smooths Any Lines Left Behind By The Roller/Squeegee And Leaves A Nice Even Clear Coat Over The Entire Floor.
5 – YOUR NEW FLOOR COATING
At This Point We Clean Up And Leave The Floor To Dry. After Four To Eight Hours, You Can Confidently Walk On Your New Coating And After 24-36 Hours, You Can Park And Drive On It. We’re Confident You Will Be Pleased With Your New Floor!